melvor idle 戦闘中の死亡で失うアイテムをリセマラ


概要

みなさん,こんにちは.nnutaです.melvor idleでは,戦闘中や盗み中に死亡すると,ランダムなアイテムを紛失します.そのアイテムをリセマラにより,こちらで指定する方法について記述します.

事前準備

  • 設定から「クラウドでオートセーブ」をオフにする
  • セーブスロット選択画面の上部,「セーブデータの上書き時に...」をオフにする

手順

  1. ゲーム終了時,戦闘などを任せて右上の強制セーブボタンを押下
  2. ゲーム再開時,ローカルセーブを読み込み
  3. 戦闘などで大事なものを紛失したら④へ.大事なものを紛失しておらず,問題なければ強制セーブボタンを押下して終了
  4. 強制セーブを押さずに,右上のプルダウンメニュー(名前が書いてある所)からキャラクター選択画面に移動
  5. 画面上部の「クラウドセーブを表示する」を押下し,クラウドセーブのスロットを押下して読み込み
  6. 紛失するアイテムが乱数によって変わります.もう一度トライしたければ④へ.問題なければ強制セーブボタンを押下して終了


なお,アップデートによって本手法が使えなくなる可能性はありますので,手頃なアイテムでテストすることを推奨します.


以上です.なにか質問等あれば,気軽にXにどうぞ.


世界樹の迷宮3 HDリマスター 5層ボスクリア後の流れ

はじめに

みなさんこんにちは.nnuです.本記事では,世界樹の迷宮3の5層ボスをクリアした方を対象として,6層ボスを倒すまでの流れについて記述します.5層ボスクリア時に6層ボスに挑むと非常に厳しいですし,他にもいろいろな強敵がいます.

大航海

攻略サイト(https://w.atwiki.jp/sekaiju_maze3/pages/96.html)を見つつ,大航海を最後まで進めます.くわえて,大航海クエストも,簡単に倒せる範囲のボスは全て倒しておきます.それにより,リミットスキルなどが獲得できます.

準最強装備の収集

自分のパーティの「準」最強装備を収集しておきます.最強装備は,この後戦う三竜(偉大なる赤竜,雷鳴とともに現れるもの,氷嵐の支配者)とクエストボス(アルルーナ,イソギンチャク,クラーケン),大航海クエスト(エルダードラゴン)から作成できるものが多いので,現時点では作れません.二番手の武器・防具を作っておきましょう.

武器の強さは以下のページが参考になります.

lushgreengame.com

なお,自分のパーティーメンバーと,この時点での装備を以下に述べます.

プリンセス:ツヴァイハンダー,ロイヤルバーニー
ファランクス:グラーシーザ,針殺しの革鎧
ウォリアー:カラドボルグ,ベルセルクレザー
モンク:断罪の戦棍,明王の衣
ゾディアック:天命の石版,天狼星の肩章

各キャラの残り二つの装備枠は,ボスごとに変更します.

鍛冶

上記で入手した装備を,鍛冶でフル強化してください.お金稼ぎはファーマーで稼ぐ方法を使います.もし知らなければ検索してください.

幸運のハンマー 

幸運のハンマーはリミットスキルのうちの一つで,壊属性攻撃+そのターンに倒した敵の素材を全て獲得できます.最強武器を今後作っていくなかで,必要なレアドロップを確定で入手できます.

入手方法は,大航海クエストのレヴィアタン(都市ウガリート)から入手できます.上記の準最強装備を作っておけば,レベルが極端に低いなどのハンデがなければ楽にクリアできるでしょう.

耐凸護符など×5

これから戦う強敵に備えるために重要なのが,強斬の護符,圧壊の護符,貫突の護符の3つです.これらは,斬,壊,突属性の物理攻撃への耐性をそれぞれ大幅にアップしてくれます.この護符は装備枠がいるため,護符を装備すればその分盾などは装備できませんが,それでも護符をおすすめします.最終的な被ダメージはこちらを装備するほうが低いためです.

ちなみに,この護符が店に並べられるためには,いくつかの敵ドロップアイテムが必要です.そのうち真鉄の牙はレアドロップで確率が低いので,上述した幸運のハンマーを利用しましょう.

最終的には,それぞれの護符を5個ずつ買ってください.


三竜討伐

現時点では,レベルが70以上は上がらないはずです.これを解除するためには,三竜と呼ばれるボスをそれぞれ倒す必要があります.竜を一つ倒すごとにレベル上限が10上昇し,全ての竜を倒すと上限は99となります.

攻略法は以下のページを参考にしてください.このとき,各竜が行う物理攻撃の属性をしっかりと調べ,対応する護符を装備してください.例えば,赤竜に挑む場合,赤竜の物理攻撃の属性を調べると壊・斬とあります.ですから,護符は圧壊と強斬を装備します.


w.atwiki.jp

なお,攻略の順番は赤→氷→雷がおすすめです.赤竜さえはじめに倒してしまえば次の氷はレベルを80まで上げられますし,最後の雷竜はレベル99で挑めるので簡単です.

レベル上げ

絶対にする必要があるわけではありませんが,今後のボスを楽に倒したいなら,この時点でレベル99まで上げてしまいましょう.

エストボス討伐

ここでいうクエストボスとは,酒屋で受注できるクエストのうち,特に強敵であるアルルーナ,クラーケン,イソギンチャクを指します.なお,レベルを上げておけば楽勝のはずです.

エルダードラゴン討伐

大航海クエスト最終ボスのエルダー・ドラゴンを討伐します.なお,エルダードラゴンはギミック性が高く,非常に面倒くさいです.もし裏技に抵抗がなければ,以下のページを参照することを勧めます.

sq5-research.hatenablog.com

最強装備の収集

この時点で六層ボスと真EDのボス以外は倒しており,最強装備が作れるはずです.上述した最強装備のページを参考にしてください.ただし,攻撃力最強を追い求めるだけでなく,HPやTPの効果がついている武器を作成することがおすすめです.

以下に自分の装備を述べます.なお,プリンセス,ファランクスの最強武器は鍛冶で攻撃力が伸びる真竜の剣であり,ゾディアックの最強武器は同じく鍛冶で強くなるMの書です.しかし,TP増加の効果がついている武器が自分は良かったので,神竜の剣と天命の石版にしています.

プリンセス:神竜の剣,ロイヤルバーニー
ファランクス:神竜の剣,鋼騎士の鎧
ウォリアー:真竜の剣,ベルセルクレザー
モンク:ウコンバサラ,明王の衣
ゾディアック:天命の石版,天狼星の肩章

鍛冶

先ほどの最強装備を鍛冶で強くします.真竜の剣は鍛冶が大変なので,妥協してもよいと思います.

引退とレベル上げ

現在はレベルが99となっているはずですので,彼らを「引退」(ギルドから選択可能)して,少しパラメータの高い新しい冒険者を招きます.彼らを再度レベル99にして,育成終了です.

禍神討伐

以上を行えば,ある程度簡単に討伐できるはずです.


以上です.

もしなにかあればXやコメントにどうぞ.


Cento:game system guide for novice

 Greetings

In this article, I will explain the game system of Cento, a game that has recently been sold on steam.I will explain the game system of Cento, a game recently released on steam.

store.steampowered.com

Game System

This game is a one-on-one PvE game, in which the player aims to win by entering commands in rhythm and inflicting damage to the opponent. The victory condition is to push the "Judge" into the opponent. The Judge moves to the opponent's side when the opponent is damaged, and moves to the player's side when the player is damaged.The position of the Judge is +8 (-8) at the beginning of the game, but as the game goes on, the absolute value of the Judge decreases, and eventually it is +1 (-1). This position is indicated by an X on the judge's bar, and the winner is determined when the judge remains above this mark for 3 seconds.

Match and Hit

When an enemy performs a move (command), he usually takes damage or receives a debuff. This is called a match.However, when the enemy does a "match", it is called a "hit". By "matching", the value of damage and debuff will be reduced.
When the opponent performs a move, an arrow appears on the command input bar. You can then match it by pressing the arrow button at the same time.

Types of Techniques

There are three types of moves (commands) in the game.

  1. Attack and debuff type
  2. Buff type
  3. Self-destruct type

The first type includes many basic techniques such as "xx dama" and "suzuki", and many of them cause damage to the opponent.

2 is applicable to "Hacktu", "Piaffe", etc., which give buffs such as defense to oneself. In addition, the techniques with the words "water shot" and "earth shot" in the technique description are matched after a few beats, and if successful, the effect will increase. However, as the number of matches increases, it can be difficult to know which match corresponds to the opponent's attack, so beginners should avoid characters with "water" and "earth" in their descriptions.

Attributes of techniques

Techniques have attributes, which are determined by the color of the technique. There are many such as fire, water, and electricity.

Power of the technique

There is no description of the power of a move, but it is probably the number of commands required for the move. An attacking move with a power of 3 does 3 damage to the opponent, and a buffing move gives the corresponding buff to the player.

Hand and deck

The area lined up with moves is called the hand, and the area to the left of it, below the number "12", is called the deck. When you play a move from your hand, you draw from the deck at the end of your turn.

Level

There is no explanation for this, but when you play a move, the gauge in the lower center of the deck accumulates.As it accumulates, the number of cards in your hand increases little by little. The gauge is reset after each battle.

Changing the decision button

It does not seem to be possible.

Buffs and Debuffs

There are various buffs and debuffs such as defense, scent, and evasion. Pressing the L/R button in the technique description box changes the description, and you can read the description of the buff/debuff related to the technique. Anyway, read the descriptions to gain knowledge. By understanding the information little by little, you will be able to think while you fight.
The maximum value of most buffs and debuffs seems to be 9.

First and Second Offense

The coin toss is done first, and if it is red, the game starts from your turn, and if it is blue, the game starts from your opponent's turn.

Rewards of Kachinuki

In Kachinuki, you will receive a set of equipment and a set of effects for your techniques.The upper part of the selected yellow color is the equipment and belongs to your character. The lower part is the effect, and you can select one technique to be granted. Note that if you set the "Extend" option in the Kachinuki settings, more commands will be required each time you want to give an effect to a technique.

Favorability

Of the 16 characters, all but the four characters in the upper row, which can be modified by "Soubi" as original characters, have a sensitivity level. Favoritism can be raised by playing against the target character in Kachinuki or by playing a simple game. As the likability level increases, the character gains equipment and techniques that are unique to that character and can be used in "Soubi".


That's all. I've also made a blog about achievements, so please take a look if you want to know more about them.

nnu.hatenablog.com

If you have any questions, please contact us on Twitter.

Cento:general guide to unlock all achievments

Greetings

Hello, my name is nnu. This article explains how to unlock achievements for cento, a game available on steam. Some of the achievements are summarized and some are omitted. If you have any questions, please contact me on Twitter.

The order of the description is: Achievement name, description of the achievement, and tips on how to unlock the achievement.

Preparation

Many of these achievements require subtle adjustments, so the difficulty level is high. However, if the opponent does not do anything, they are quite easy.

Therefore, it is important to use "SOUBI". Create a character with no offensive or defensive buffs in "SOUBI", and fight with that character in "Simple". This will be easy because the opponent will not attack or generate defense or evasion buffs.

Specifically, the following technique and equipment configurations are used. This character will be referred to as the "self-made character.


Note that the attacking achievements require the opponent to attack to adjust the damage, so use Tetley or any other character you like.

Terminology

Various terms are used in the game, such as "special notes," "level," "liking," "deck," "hand," etc. If you are unfamiliar with any of these terms, please refer to the article below. If you don't know any of them, please refer to the following article.


nnu.hatenablog.com

Achievements

Acquisition of a "Kime-star

Myself: Tula, opponent: Anything

When you perform the "Piaffe" technique, special notes are generated on your board. Adjust your timing so that the technique will be triggered by these notes.

Time of Autumn Leaves

Myself: Kravis, Opponent: Anything

The "Miscanthus" and "Onnen" techniques can give combustion, but the combustion is reduced to 1/3 at the beginning and end of the opponent's turn, respectively, so it is best to give combustion in one turn. Therefore, it is best to intentionally extend the battle to raise the level of the game before playing.

Inundating Red

It can be released at the same time as the "Romantic Cannon" described below.

Giant Step

Myself: Gurai, Opponent: Any

By using Gurai's technique "Nigemizu" to gain evasion, and by taking several attacks from the opponent, you can reduce the evasion buff stack and have the opponent attack you with evasion 1 until you can evade. Adjust your judges carefully so that you don't lose.

Sleeping with Mushrooms

You: Anything, Opponent: Anything

In simple mode, set the strength of the pitch and the opponent to the minimum. If you are in a pinch, you will have to think about the command before you do it, as there will be lag.

The lion that never sleeps

During the tutorial, judges seem to reset every turn? During the tutorial, it seems that the judges are reset every turn. It seems that you will have to have some luck to beat it, so try a few times.

Report Submission

Myself: Gurai, Opponent: Anything

You can get fragrance by using the technique "Amble".

Even the stomachache on the next day is lovely!

Myself: Chitose, opponent: Anything

The techniques "Kamitsuki", "Scalpel", and "Desuro" give bleeding.

Lifting

Myself: Inagi, opponent: Anything

Water hammer" is probably a mistake for "water shot". Generate the technique "Asatsuyu" and match it.

You can also polish the horns and so on.

You: Ruff, Opponent: Anything

The technique "MIKIRI" gives evasion.

Ruins of Ubi Civilization

Myself: Kazakiri, Opponent: Anything

Techniques "Snaabi" and "Hakkutsu" are targeted.

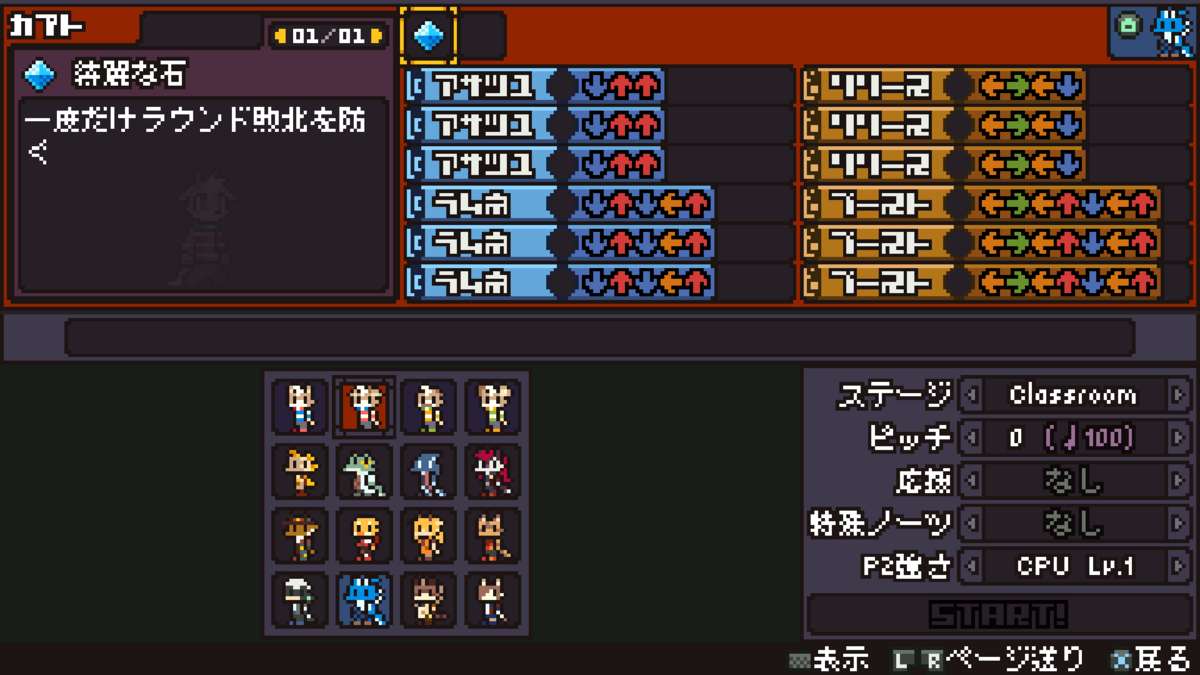
Up, up, up, up, up, up, up, up, up, up, up, up, up...

Use Tetley's equipment "Narcissus Brooch". It is easy to understand after raising the level to the maximum.

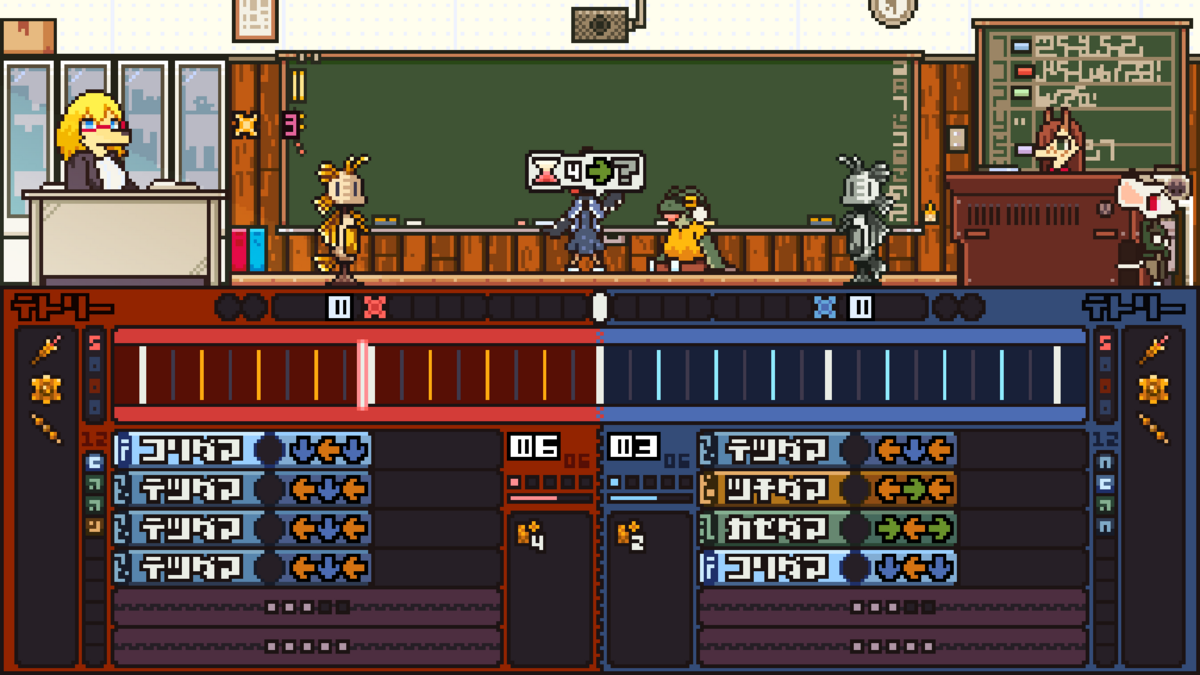
Soft and pleasant voice

In the simple mode, set the cheering to "more". Then, as shown in the image below, a speech bubble will appear in the upper center of the screen.

Relieve stiff shoulders

Self: Kohaku, Opponent: Self-made character

Keep using only the "Glidora" technique. If you do not have it in your hand, reload.

Birds of a Feather

When you raise your character's favorability, he will give you techniques that can be used in Soubi. When you have enough of them, use the ones you can and clear the game.

Birds of a Feather

Self: Kohaku

The electrification can be given to yourself or your opponent with the techniques "Veridora", "Obadora", and "Pulse". Incidentally, if you give a charge to your opponent, the charge will be transferred to you when you are attacked by your opponent. Therefore, do not give a charge to your opponent or yourself. Use techniques other than the above to fight. It is not that difficult.
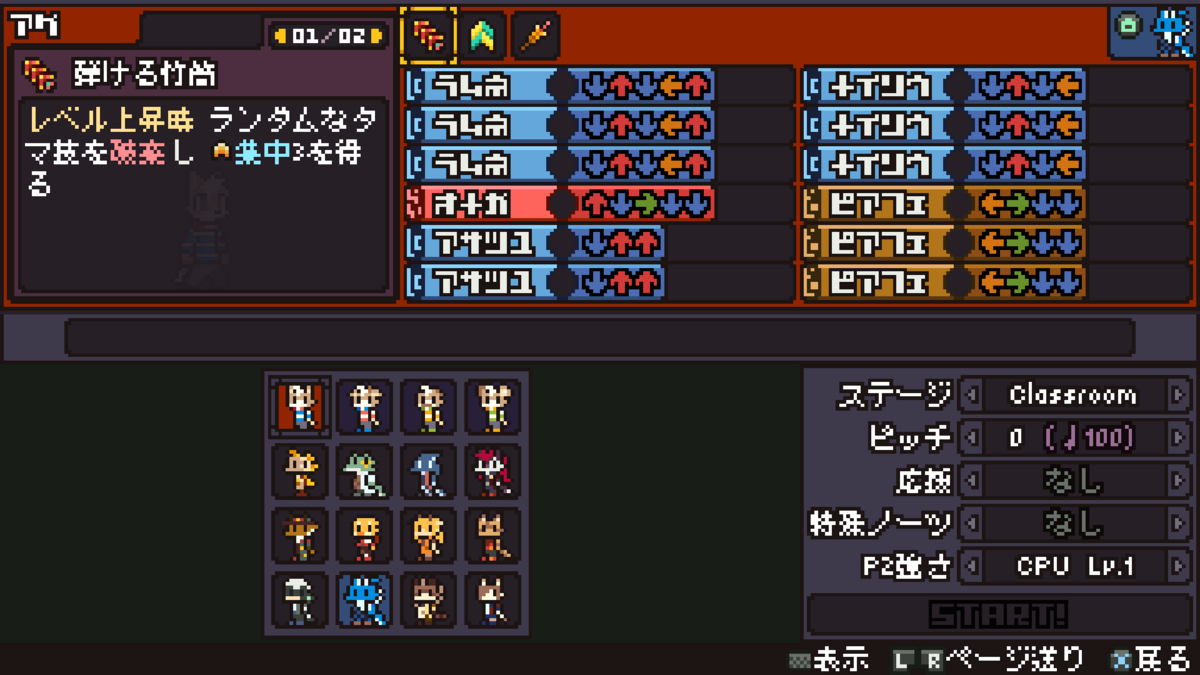
Romantic Cannon

Create the following characters.

You: the above character, your opponent: the character you created in the "Preparation" section.

Play a simple game, and make sure that you have "Omega "*1 and "Ramune "*2 in your deck and hand.
After that, you play one turn at a time, using Ramune, Ramune, Omega, and so on.
You can deal more than 30 damage only if your opponent does not match Omega. If it matches, you have to start all over again.
Crocodile Family

Myself: Chitose. Opponent: Anything

When you are bleeding, the judge moves forward due to the effect of the "Tight Belly Wrap". Therefore, you must first use "Desuro" to make yourself bleed, and then press a key while you are bleeding to take the damage.

The condition says "total 20", but I think it means "total 20 times", not "total 20 squares". It is tedious, but do your best.

Explosion Rally

Myself: Tula, opponent: Tula (strength 5)

In simple mode, you play a mirror match against the strongest Tula.

First, use Piaffe and wait for the BOMB NOTES to appear.
When the BOMB NOTES appear, press the key on the BOMB NOTES.
The effect of Tula's equipment is that you do not take any damage, but the opponent will receive 2 BOMB knots, double the number.
If the opponent is the strongest, he will also reflect the Bombs to your side. In this case, the effect of the equipment will be 4 Bombs.
Since 4 BOMB-KNOTES are placed on your side, you step on all of them.
Then, 8 BOMB knots are placed on the opponent.
... and so on. And so on, and so on, until there are more and more Bombs on the board, until there are more than 10 Bombs on the board.

Cento 全実績解除のススメ

挨拶

こんにちは.nnuです.本記事では,steamで販売中のゲームcentoの実績解除について説明します.なお,簡単な実績は省略したり,一部の実績はまとめたりしています.質問等,何かあればTwitterまでどうぞ.

実績名,実績の説明,解除のコツの順で記述します.

事前準備

これらの実績は,微妙な調整を必要とするものも少なくないため,難易度は高いです.しかし,相手が何もしてこなければ,かなり簡単になります.

よって.「ソウビ」で攻撃技や防御バフ技を持たない技構成のキャラを作成し,そのキャラを相手に「シンプル」で戦闘します.すると,相手は攻撃したり,防御や回避のバフを生成したりしませんから,簡単になります.

具体的には,以下の技・装備構成にしてください.以下,このキャラを自作キャラと呼びます.


なお,攻撃する系の実績は,相手にダメージ調整のために攻撃してもらうことが必要になるので,その際はテトリーなど,好きなキャラでやってください.

用語について

特殊ノーツ,レベル,好感度,山札,手札など,色々な用語が出てきます.ご存じないものがあれば以下記事まで.

nnu.hatenablog.com

実績

キメ星獲得

自分:トゥーラ,相手:なんでも

技「ピアフェ」を出すと,自分の盤面に特殊ノーツが生成されますが,その中で橙色に光っているのがパワーノーツです.このノーツで技が発動するようタイミングを調整しましょう.

紅葉する時間

自分:クラヴィス,相手:なんでも

技「ススキ」「オンネン」で燃焼を付与できますが,燃焼は相手のターン開始時・終了時にそれぞれ1/3になりますので,こちらの1ターンで付与し切るとよいでしょう.そのため,わざとバトルを伸ばしてレベルを上げてからやりましょう.

押し寄せる紅

後述する「ロマン砲」と同時に解除できます.

ジャイアントステップ

自分:グライ,相手;なんでも

グライの技「ニゲミズ」で回避を獲得し,何回か相手の攻撃を受けることで,回避のバフスタックを減らし,回避1の状態で回避できるまで相手に攻撃してもらいます.負けないように,注意してジャッジを調整しましょう.

キノコと寝てみた

自分:なんでも,相手:なんでも

シンプルモードで,ピッチと相手の強さを最低にするとやりやすいです.なお,ピンチになってからコマンドを打っていると,ラグがあって無理なので,ある程度考えながらやりましょう.

眠ってない獅子

チュートリアル中は,1ターンごと?にジャッジがリセットされるようです.運もないと倒せなさそうなので,何回かチャレンジしましょう.

レポート提出

自分:グライ,相手:なんでも

技「アンブル」で香気が獲得できます.

翌日の腹痛さえも愛おしい

自分:チトセ,相手:なんでも

技「カミツキ」「メス」「デスロ」で出血付与.

リフティング

自分:イナギ,相手:なんでも

水撃は,おそらく水射の間違いです.技「アサツユ」を発生させ,マッチしましょう.

ついでに角みがいたりして

自分:ルフ,相手:なんでも

技「ミキリ」で回避付与

ユビ文明の遺跡

自分:カザキリ,相手:なんでも

技「スナアビ」「ハックツ」が対象

上下上下上下上下...

テトリーの装備「水仙のブローチ」を利用.レベルを最大まで上げてからだとわかりやすいです.

柔らかく感じのいい声

シンプルモードで,応援を「多い」にします.すると,下の画像のように,上部中央に吹き出しが出るので,これに従ってコマンドを入力しましょう.

肩こり解消

自分:コハク,相手:自作キャラ

技「グリドラ」だけを使い続けましょう.もし手札になければリロード.

バーズオブアフェザー

キャラの好感度を上げると,ソウビで利用可能な技をプレゼントしてくれます.それが揃ってきたら,揃えられる属性で揃えてクリアしましょう.

一丘之狢

自分:コハク

帯電は,技「ベリドラ」「オバドラ」「パルス」で自分や相手に付与します.ちなみに,帯電は相手に付与した場合,相手から攻撃を受けると自分に帯電が移ります.よって,相手にも自分にも帯電を付与してはいけません.上記以外の技で戦いましょう.そこまで難しくはありません.

ロマン砲

以下のキャラを作成して下さい.

自分:上記キャラ,相手:「事前準備」で作った自作キャラ

  1. シンプルで対戦し,山札と手札が残り「オメガ」*1,「ラムネ」*2になるようにします.
  2. その後,1ターンずつ使って,ラムネ,ラムネ,オメガと使います.
  3. 相手がオメガを「マッチしなかった時に限り」30ダメージ以上与えられます.マッチした場合は1からやり直してください.

ワニの家族

自分:チトセ.相手:なんでも

自分が出血を喰らうと,「よれよれの腹巻」の効果でジャッジが前進します.よって,まず「デスロ」で自分に出血をつけ,出血がある間にキーを入力することでダメージをくらってください.

条件には総計20とありますが,総計20マスではなく,総計20回と思われます.面倒ですが頑張りましょう.

爆裂ラリー

自分:トゥーラ,相手:トゥーラ(強さ5)

シンプルモードで,最強のトゥーラ相手にミラーマッチをします.

  1. まず,ピアフェを使い,ボムノーツが出るのを待ってください.
  2. ボムノーツが出てきたら,あえてその上でキーを入力します.
  3. トゥーラの装備効果で,自分はダメージを受けずに,倍である2個のボムノーツが相手に配置されます.
  4. 相手が最強の場合,相手もボムノーツをこちら側に反射してきます.この時,装備の効果でボムノーツは4つになります.
  5. こちらに4つのボムノーツが配置されるので,こちらもすべてそれを踏みます.
  6. すると,相手に8つのボムノーツが配置されます.
  7. ...と続けていくと,どんどんと盤面上のボムノーツが多くなり,10個以上になります.

Cento ゲームシステム解説 初心者向け

挨拶

こんにちは.nnuです.本記事では.最近steamにおいて販売されたゲームCentoのゲームシステムについて解説します.

store.steampowered.com

ゲームシステム

本ゲームは1対1のPvEゲームで,リズムにのってコマンドを入力し,相手にダメージを与えることで勝利を目指すゲームです.勝利条件は「ジャッジ」を相手に押し込むことです.ジャッジは相手にダメージを与えると相手側に進み,自分が受けると自分側に進みます.なお,勝利条件となるジャッジの位置は,初めは+8(-8)あたりですが,試合が長引くにつれて絶対値が小さくなり,最終的には+1(-1)になります.この位置はジャッジバーの×印で表され,ジャッジがこの印を超えた状態で3秒ほど維持すると勝敗が決定します.

マッチとヒット

敵が技(コマンド)を出すと,普通はダメージを受けたり,デバフを受けたりします.これをマッチと呼びます.しかし.それを「マッチ」することで,ダメージやデバフの値が少なくなります.

具体的には,相手が技を出すと,コマンド入力バーのところに,矢印が出てきます.そして,それと同じタイミングで矢印ボタンを押すことでマッチできます.

技の種類

本ゲームには3種類の技(コマンド)があります.

  1. 攻撃・デバフ型
  2. バフ型
  3. 自爆型

1には基本技の「〇〇ダマ」「ススキ」など多くの技が該当し,相手にダメージを与える技が多いです.

2は,「ハックツ」「ピアフェ」などが該当し,自らに防御などのバフを与えます.また,この技のうち,技説明に「水射」「土射」と書いてあるものは,数拍後にマッチが発生し,成功すると効果が上昇します.ただし,マッチが増えることで,相手の攻撃に対応するマッチがわからなくなることもあるため,初心者は「水射」「土射」とあるようなキャラは避けるのも良いです.

技の属性

技には,属性があり,それは技の色で判断します.火,水,電気など多くあります.

技の威力

説明がないので確実ではありませんが,おそらく技に必要なコマンドの数が威力です.威力が3の攻撃技なら相手に3ダメージ,バフなら対応するバフが自身につきます.

手札と山札

技が並んでいる部分を手札,その左にある,「12」という数字の下側にある部分を山札と呼びます.手札から技を出すと,ターン終了後に山札からドローします.

レベル

説明がありませんが,技を出すと,中央下のゲージが溜まっていきます.これが貯まると手札の枠が少しずつ増えていきます.バトルごとにリセットされます.

決定ボタンの変更

できないっぽい.

バフ・デバフ

防御,香気,回避など様々なバフ・デバフが存在します.技の説明欄でL/Rボタンを押すと説明が変わり,その技に関係するバフ・デバフの説明が読めます.とにかく,そこを読んで知識をつけていきましょう.少しずつ理解していくことで,考えながら戦うことができます.

なお,ほとんどのバフ・デバフの最大値は9のようです.

先行と後攻

はじめにコイントスを行い,赤なら自分のターンから,青なら相手のターンから始まります.

カチヌキの報酬

カチヌキでは,装備と,技に付与する効果がセットでもらえます.選択した黄色の上部分が装備で,キャラに属します.下部分が付与効果で,1つの技を選んで付与できます.なお,カチヌキの設定で最初に「延長」をありにしておくと,技に効果を付与するたび,必要なコマンドが多くなります.

好感度

16キャラのうち,オリジナルキャラとして「ソウビ」でいじれる上段の4キャラ以外には,好感度が設定されています.好感度はカチヌキで対象のキャラと対戦したり,シンプルで対戦することで上昇できます.好感度が上がると,そのキャラ特有の装備や技が獲得でき,「ソウビ」で使えるようになります.


以上です.実績の解説についてもブログを作ったので,よければ見ていってくださいね.

nnu.hatenablog.com

もし,質問等何かあればTwitterまでどうぞ.

嗜血印 bloody spell 全実績解除のススメ

挨拶

こんにちは.nnutaです.本記事では,bloody spellの全ての実績を解除する上でのコツを記述します.なお,解除が簡単な実績については省略していますので,もしその部分で困った場合はtwitterなどに連絡して下さい.また,日本語だと翻訳が雑なので,英語でやることをお勧めします.

実績名を太字で,その後に和訳とコツについて記述します.


Justice martial art

修道院装備一式を装備する.

この装備は,一章で全て獲得可能で,名前の最後に「monastery」とついている装備のことです.人が亡くなっている場所などを調べられるので,そこから入手しましょう.

Mania for destruction

オブジェクトを250個破壊する.

木箱などを攻撃やダッシュで壊せばOKです.

Sharp eyes

ツボをシャッフルして中身を当てるゲームを5回連続で当てる.

5章を進んでいくと住民がいる村がありますが.そこの子供にとうもろこしをあげるとゲームができます.ツボの中にオブジェを隠して,シャッフルされるので,それを当てればOKです.自分はそれを録画して,低速再生することでクリアしました.

Secret base,Pursuing navigation,Visitor from outer space,Great merit

それぞれの条件は,隠しエリアである開発スタジオに入ること,スタジオにあるドアを開くための鍵を獲得すること,とある場所にいる防護服を着た人に会うこと,その人からもらった防護服をスタジオにいる人に渡すことです.

以下の動画を参考に.

www.youtube.com

Silent excutioner

ステルスキルで20体倒す.

終盤の武器を使い,序盤の敵の後ろから歩きで近寄り,ステルスキル.

Ore collector

鉄鉱石を10個所持する.以下の動画を参考に.なお,ストーリーをハードでクリアする実績がありますが,この鉄鉱石を使って武器や防具を十分強化するとだいぶ楽です.

www.youtube.com

Catch mice

鼠取りのゲームで9体倒す.

累積なので,1ゲームで9体倒す必要はありません.

Deep evil

すべてのbloody spellを習得する.

passiveスキルだけで良いみたいです.(スキル獲得画面の左半分).もし他の実績を解除した後に解除できていなかったら,スキル解放のために必要な石を石碑でランダムに買えるのでリセマラしましょう.

Skilled craftman

前述した強化を9回成功させる.前述しましたが,ハードクリアのために強化は近道になるので,ぜひやっておきましょう.

Priestess trial

priestess trialをクリアする.これは,other modeの中にあるpriestess examのことで,4フロアクリアが必要です.武器防具を強化した後にやるのがおすすめ.

No desire

クリア後の真っ白な空間にいる人間を攻撃する.

Master of magic

magic 武器種のスキルを全て獲得する.

magicスキルの熟練度を貯めるためには,杖の武器が必要です.しかし,他の武器種とは異なり,ストーリーで杖はドロップしません.杖を使うためには,妹の小鯉のスキンを装備する必要がありますが,注意して欲しいのが,小鯉のスキンには2種類あるということです.一つ目はストーリーのボス小鯉を倒した時に(確率で?)ドロップするスキン,もう一つがマルチプレイヤーモードのクリアで(確率で?)ドロップ,もしくはDLCを購入して獲得するスキンです.残念なことに,前者のスキンを装備しても杖は使えませんが,後者であれば装備と同時に武器が杖に変更されます.

よってDLCの金額1000円を払いたくないなら,マルチプレイヤーモードのクリアが必要です.なお,自分はマルチプレイヤーモードをクリアして獲得したので,DLCで本当に杖が使えるかは確実ではありません.

マルチプレイヤーモード>Online game>Create roomを選択し,ルーム名はてきとうに,Game modeがprotect sisterとなっていることを確認,serverから一番msの値が高いものを選択します.

内容としては少し難しいです.落ちている装備を拾いつつ,石碑で装備やアイテムを売ったり買ったりして,クリアを目指しましょう.なお,妹のHPがなくなると失敗ですので,十字ボタン右の長押しで設置できるHP回復灯台で回復させてあげましょう.

Darts expert

飛刀で相手の攻撃を20回パリイ.

対応するbloody spellを習得している状態でないと無理です.飛刀はPS4コントローラーなら○ボタンで出ます.

Inflatable toys

inflatable武器を見つける.以下のサイトを参考に.ただし.少し情報が古く,最初の「インフレータブル武器 – 大ハンマー」は削除されているようですので,それ以外を探しましょう.steamah.com

Sombra

陰を5体倒す.

陰というのは,最終章に出てくる黒いやつです.

Chaos's ultimate weapon

混沌武器を5つ獲得する.以下のサイトを参考に.

steamcommunity.com

Master

メインストーリーをハードでクリア.

少々難しいですが,先ほど示したように.武器や防具を十分強化しておけば問題ないはずです.なお,このゲームはストーリーモードを遊ぶ時,毎回難易度を選ぶ必要がありますよね.ですので,間違ってその時にeasyなどにしないよう細心の注意を払いましょう.

You are strong

ブラッディパレスモードをクリア.

51階層まであります.なお,死んだらその層からやり直しできます.さらに,一度ゲームを終了しても,newgameを選択しない限りはその層からやり直しできます.

Guard

衛兵?を20体倒す.

自分はよくわからなかったので,チャプター9を周回してたらすぐ解除できました.

Bat

コウモリを100体倒す.

一番面倒くさいやつです.自分が稼ぎに使用した場所は,最終章で空が赤い空間に飛ばされ,雑魚軍を突破していくところです.

雑魚軍の3軍目ぐらいにコウモリが3体出てくるので,コウモリを倒したらあえて放置して相手に倒させます.そうすると,事前にセーブがかかっているはずなので,何度もカウントできます.


以上です.何かお困りごとあればtwitterにどうぞ.